
What is a Player Journey in Gaming?
Player Journey is a term that is exclusively used in the gaming industry. It can be described as the entire experience a player has while interacting with a gaming brand. A player journey begins right from brand discovery to signup and continues throughout the player’s engagement. It’s not just about transactions; rather, it’s about the player’s interaction and overall experience with the brand.
The importance of Player Journey in the Gaming Industry
A well-structured Player Journey is one of the most important aspects of marketing for a gaming operator, it helps them to exploit their interactions with users more effectively. A seamless player journey helps gaming operators stay in control and provide a wonderful user experience to their players. Multiple touchpoints can be strategically placed to explore and exploit the opportunities that the player journey provides.
With the help of marketing automation platforms like OptiKPI, operators can design tailored journeys that reach players at the right moment with the right message. This strategic approach helps maximize conversions and ensures an engaging gaming experience.
The 6 Stages of a Player Journey
1. Brand awareness:
Basically this is where it all begins, the exposure of a brand to its potential customer is the first interaction between the brand and a user. Brand awareness is nothing but the popularity/familiarity of a brand among consumers. Expensive online gaming marketing campaigns by big brands are usually carried out to spread out general information about their product or service to the public in order to raise awareness.
The online gaming industry is one such sector that relies heavily on raising its brand awareness for a competitive edge. Gaming operators try to acquire players by shelling out huge budgets, since once a player associates themselves with a Gaming brand, he/she will become a loyal customer as long as the service is good.
2. Sign-up:
The process of enrolling on a gaming platform is called signup. This is one of the most important parts of a player’s journey since this is where a gaming operator gets the opportunity to convey his brand’s position and the services that are up for offer. The signup is usually a huge stepping stone in the journey path, once the process is completed successfully, all the required data for future touch points are acquired.
3. First Time Deposit:
After onboarding players into a gaming platform, the marketing procedures can begin with full force. The operators can now engage players with personalized messages, converting a user into a first time depositor is usually the next step.
For example: Welcome offers – Send out personalised automated greetings with exclusive deposit bonus offers to welcome all newly registered right after they sign up, the given campaign is automated and runs in real-time with the help of OptiKPI.
4. First Games Played:
First games are those games that a newly registered player tries out right after he enters the platform. Players’ journeys can be influenced by the operators to a certain extent, they can lay out touch points all along the way to continuously engage and direct their journey. Gaming operators can suggest games and provide exclusive offers on the basis of the first-time deposit amount.
For example: If a player deposited $50 dollars, OptiKPI will automatically select the best-suited games for that deposit amount and send out suggestions along with special offers related to those games.
5. Favorite Games & Personalization:
As players continue their journey on a gaming platform, the data collected along their path are used for creating complete player profiles. All of their activities and behaviors are constantly monitored, thus their favorite games can also be identified. The most played games are usually considered a player’s favorite game. Once we identify their favorite games, we can target them with exclusive offers and bonuses on those games. A huge increase in engagement and retention can be achieved with the help of such target marketing.
For example: Personalized offers can be automated and sent to players based on their favorite games via multiple marketing channels.
6. Churn Prevention:
Once a player feels exhausted or bored on a platform, he/she tends to drop off at a certain point. If gaming operators fail to address the situation, it will be the end of that player’s journey. Hence it is important to constantly focus on players’ behavior along their journey to reduce the churn rate.
If a player becomes inactive, strategic interventions can bring them back. Tracking player behavior allows brands to address potential churn before it happens.
For example: OptiKPI will automatically send out messages with surprising offers to all the players who are inactive for a week, such campaigns will increase player engagement and decrease the churn rate.
What does marketing automation mean for the customer journey?
Building effective player journeys are one of the key features in raising a brand, customer journeys are important for creating a path of meaningful interactions between you and your users. With marketing automation, create customized flows that touch every brand touchpoint to create a seamless journey throughout the cycle.
Apart from sticking a customer’s first name in the subject line of every message, create dynamic content that best suits different sets of customers with the help of marketing automation tools. Reach out to your players along any part of their journey to induce required alterations to their path. custom design of the life cycle of users to increase the retention ratio and decrease the churn cycle. Engage your customers in real-time with curated messages, and see to it that your players get the best experience out of your platform. Convert prospects into loyal customers and build a brand with a steady and sustainable following!
Marketing automation enhances the Gaming Customer Journey by delivering the right message at the right time.
Read more: How to Optimize Gaming Customer Journey
Player Journey vs. Gaming Customer Journey
While Player Journey focuses on a player’s experience within a gaming platform, the Gaming Customer Journey takes a broader approach, covering every stage from initial brand awareness to long-term retention. Below is a comparison:
| Aspect | Player Journey | Gaming Customer Journey |
|---|---|---|
| Focus | In-game experience | Marketing, CRM, acquisition |
| Key Stages | Signup, deposit, favorite games, churn | Brand awareness, conversion, retention |
| Goal | Enhance engagement & retention | Increase customer acquisition & loyalty |
| Example Strategies | Personalized game offers, automated bonuses | Email marketing, segmentation, re-engagement campaigns |
By integrating both journeys into a cohesive strategy, gaming brands can drive long-term player loyalty and optimize marketing efforts.
How OptiKPI Transforms Player Journeys
OptiKPI is one of the most powerful automation tools for gaming brands, it is exclusively designed for the gaming industry, and combined with the power of AI and behavioural targeting, it can boost any gaming platforms performance within a short period of time. The customization and automation of personalized messages will further help a platform to connect with your players more effectively than ever. It will help you capture a user’s interest and target only on what he is motivated by, thus improving the odds in your favor.
OptiKPI can be easily integrated into a Gaming platform as a marketing tool in a span of four weeks and is extremely user-friendly. Any and all campaigns can be customized and automated in real-time. With 24/7 customer support from around the globe OptiKPI guarantees uncompromised service.
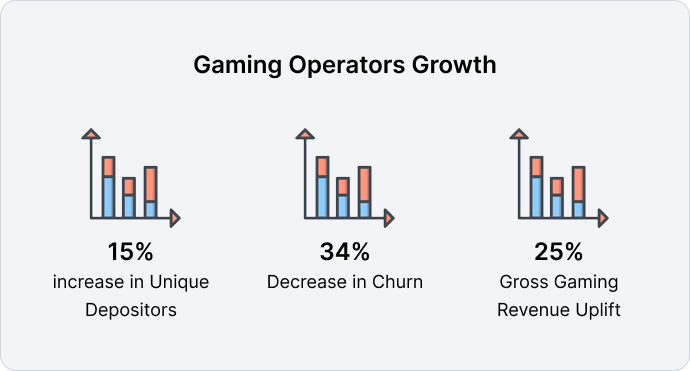
By leveraging OptiKPI, gaming platforms can significantly improve player acquisition, engagement, and retention, leading to higher lifetime value.
FAQs
A player journey refers to the complete experience a user has with a game, from brand discovery and onboarding to engagement, monetization, and retention.
Tracking the player journey helps game developers and operators improve user engagement, retention, and revenue by optimizing interactions at every stage.
The key stages include acquisition, onboarding, engagement, monetization, and retention. Each stage plays a role in maintaining long-term player interest.
1. Acquisition – Players discover and sign up.
2. Onboarding – First-time experience and deposits.
3. Engagement – Players interact with the platform.
4. Monetization – In-game purchases and deposits.
5. Retention – Keeping players engaged long-term
A well-optimized player journey reduces churn, increases in-game purchases, and improves player lifetime value, leading to higher revenue.
Frustrations like poor onboarding, difficulty spikes, lack of rewards, or engagement gaps can lead to churn and lower retention rates.
– Poor onboarding experience → Leads to drop-offs.
– Lack of engagement incentives → Players lose interest.
– Inconsistent rewards → Reduces motivation.
– No re-engagement strategy → Increases churn rate.
Yes! OptKPI identifies at-risk players early and enables game studios to re-engage them with tailored incentives, personalized content, and predictive analytics.
OptKPI provides real-time behavioral analytics, churn prediction, and personalized engagement strategies to boost retention and maximize player lifetime value.
By analyzing player behavior, OptKPI helps developers implement smart monetization strategies, such as dynamic offers and targeted in-game promotions.